
Color grading has become an almost-mandatory step in the film editing process. It can be an incredibly time-consuming process, but fortunately there’s a shortcut: LUTs. This indispensable tool ensures images have the exact desired look directors and cinematographers want.
JUMP TO
LUT is an acronym for “lookup table,” which is a digital application that interprets a set of color values.
“It is basically a formula for determining the color of any individual shot,” says Jason Charnick, postproduction supervisor and founder of Upstart Film Collective. “If you think of every color as having its own numerical value, the LUT will translate [the colors] shot in terms of numerical values and [then] convert them to a different number, so it will display images in a preset color.”
In short, it’s all based on math. A lookup table converts a set of colors into another set of colors via a predetermined conversion index.
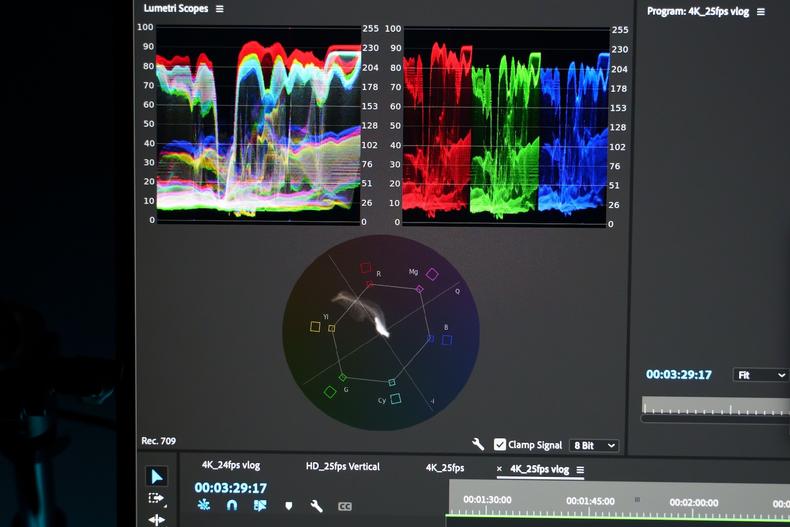 Syafiq Adnan/Shutterstock
When the production team passes footage to the postproduction team, the first order of business is checking for hiccups. Was the white balance properly calibrated? Are there lighting hot spots in certain frames? Was an actor in too much shadow during a particular shot?
This is when color correction is necessary. While there are LUTs to help with concerns such as poor white balance or shadow issues, “a LUT is not a panacea,” says Charnick. “If you apply a LUT to incorrect footage, it’ll give you an incorrect output.”
A LUT can address a singular color correction issue, but often, one issue can underlie a cascade of other problems. Applying a LUT to footage that requires multiple corrections may simply amplify those problems.
That’s why LUTs typically come into play after color correction, when an editor or colorist begins the color grading process in post. During production, the director, cinematographer, and camera and lighting crews will do as much as they can to effect the look and emotional tone they want. But because the production team may have limitations on what they can accomplish on set, color grading LUTs can be applied in postproduction to fully realize that creative vision.
“When a cinematographer is setting up, [they] have to know exactly what [they’re] going for. They have to have complete mastery of light, how to shape light, how light plays within a frame,” says Charnick. “But a LUT takes the edge off. It removes some of the parameters so things can be more flexible.”
Maybe the director wants a scene to have a bluish hue. Or they want to crunch the shadows in a particular shot for greater dramatic impact. A LUT can do that to achieve the desired visuals, so the production crew doesn’t have to bend over backwards to make it actually happen on set.
Since the purpose of LUTs is to alter the output of images, they’re common in photography and other visual-centric mediums—not just filmmaking. Any coloring software, motion graphic programs, or standard nonlinear editor systems are likely to use LUTs. Some of the more popular ones include:
LUTs may boil down to mathematical formulas, but it takes an incredible amount of creativity to make them. While it’s common for camera manufacturers to make camera LUTs, they’re far from the only producers.
Remember those software systems we mentioned? Some of them, such as Adobe Premiere Pro and Photoshop, come with limited LUT libraries as well. There are also individuals who create their own LUTs. Many filmmakers with the technical prowess to do so make, share, and sell LUTs. If you feel inspired to do so—and have the technical know-how—you too can create your own LUTs. However, it’s not necessary for filmmakers to create their own LUTs in order to use them.
 How to Become a Colorist for Film
 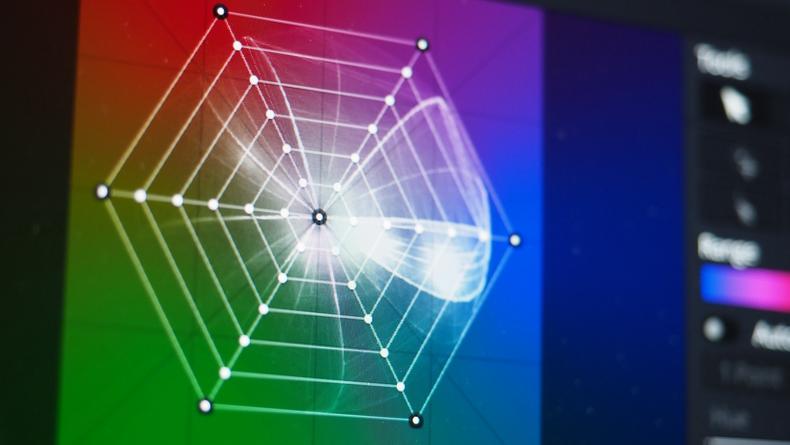 gnepphoto/Shutterstock
If you’re looking for different types of LUTs, the internet is the place to go. Some sites offer dozens, if not more, free LUTs:
- Bounce Color
- Color Grading Central
- FilterGrade
- FixThePhoto
- Ground Control
- Lutify.me
- Motion Array
- Premium Beat
- RocketStock
There you can find a wide array of the common types of LUTs, such as:
- Calibration LUTs
- Correction LUTs
- Stylistic LUTs
- Utility LUTs
Be sure to note whether you’re getting 1D or 3D LUTs. The former transforms a single value setting, while the latter allows for more control over color values with individual indexes for qualities such as hue, saturation, and brightness.
Regardless of the type of LUT you want, all it takes is a click of the download button—and potentially a purchase fee—to add a new LUT to your library.
LUTs are not uploaded like footage or imported into a program—instead, you must have a utility or plugin for them. The specifics of how to apply a LUT will depend on the software you’re using.
To give you an idea of how to apply a LUT, we’ll break down the process with Adobe Premiere Pro, one of the more popular film editing software systems:
- Open the color workspace by clicking the Color tab.
- Click on the clip you want to adjust.
- In the Lumetri panel, open the Basic Correction tab.
- Select the Input LUT dropdown menu.
- Click Browse.
- Select a LUT from Premiere Pro’s preexisting library or another LUT that you have previously downloaded.
- View changes made to the clip with the applied LUT.
Though LUT application will vary from one software program to the next, you can immediately see how it changes the look of the footage upon application.
“The LUT can be applied and rendered instantaneously. Real time. You can see what you’re getting as you’re editing,” Charnick says. “That’s really something you couldn’t do 10 or 15 years ago. The powers of the computer have helped to proliferate LUTs. It’s basically turned them into color presets.”
When you want to apply a color grading LUT, keep in mind:
- LUTs are specific to the camera the footage is shot with. For instance, a LUT created for a Nikon camera cannot be used on footage shot with a Sony camera because the calibrations are specific to the former.
- If you have not completed the color correction process, applying a LUT will amplify any outstanding issues, even if the LUT used is for the correct camera. Set your LUT up for success by color correcting first.
- Because a LUT’s effect can be seen in real time, you can immediately know if it’s accomplishing what you want. If not, you can continue to tweak the footage or use an alternate LUT that may be more successful in achieving your desired look.
While LUTs are primarily used during the postproduction process, they can be useful on set, too.
“Cameras can show more colors than ever before, but sometimes monitors can’t show the full range of color information that you can capture with a camera,” says Charnick.
If your video village has monitors without the capacity to accurately show what a camera captures, you need a LUT to make that adjustment and “convert the footage shot into something the computer or monitor can output.”
LUTs can also help cameras be more consistent. “Cameras made by different manufacturers have different resolutions, different color science, and different everything to them,” Charnick says. A Sony camera’s “true blue” may not align with a Nikon’s “true blue,” so camera LUTs are crucial.
If you’re using multiple cameras for a production, you’ll need camera LUTs to adjust for the discrepancy. Camera manufacturers know this, so they will typically produce their own LUTs for easier use.
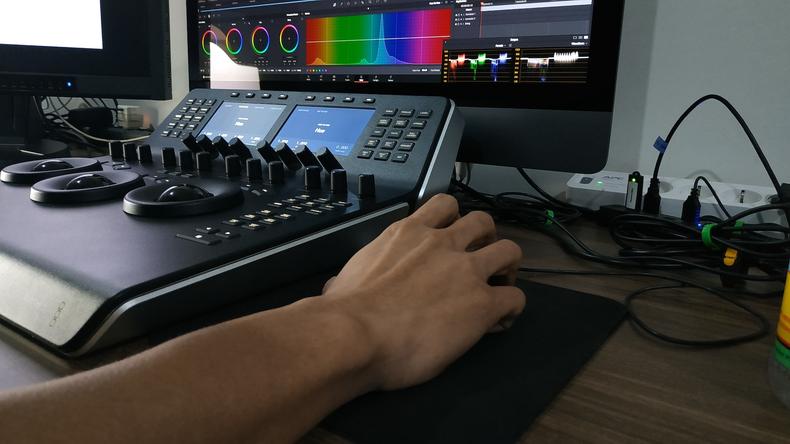 bagussatria/Shutterstock
Like any other filmmaking tool, planning ahead will help you take full advantage of LUT magic.
Preplan the look you want
LUTs can do a lot of heavy lifting, but if you don’t know what they’re going to lift, it’ll be more difficult to make it happen in post. Have a plan for what look you want, as well as what you can capture on set, so that the right LUT can be used to carry the footage the rest of the way.
Capture quality footage on set
Properly calibrate your white balance. Be mindful of shadows and hot spots. If shooting outdoors, plan for the appropriate time of day. Don’t shoot at high noon if you intend to use a day-for-night LUT. Even if the LUT can successfully output the footage to make it appear as nighttime, shadows that tend to show when the sun is at its strongest may still be present in your newly transformed “nighttime” footage.
Don’t rely entirely on LUTs to color correct
To reiterate, LUTs can help during the color correction process, but they cannot fix poorly shot footage on their own. “If you’re not putting your best foot forward initially, a LUT won’t be able to save you,” Charnick says.
The age of digital filmmaking has brought with it a number of innovative ways to correct, alter, and enhance footage, including the usage of LUTs. While it is still the responsibility of the filmmaker to aim for well-captured footage, their ability to make basic or creative adjustments has never been easier with the multitude of LUTs at their digital fingertips.