From Ironmouse to IShowSpeed, content creators of all stripes are finding success as streamers. Professional streamers often have elaborate setups that can cost thousands of dollars. You may not use quite the same rig to start out, but let’s cover the basics of what you need to stream at a quality that will get viewers coming back for more.
JUMP TO
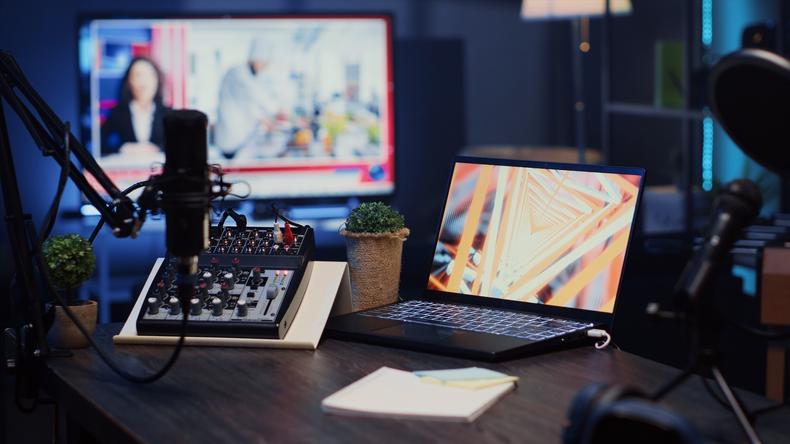
Credit: DC Studio/Shutterstock
Before diving into equipment, it’s worth framing how you think about streaming gear. Your setup should provide clarity and consistency—a stream with crystal-clear audio and stable video beats a 4K cinematic feed with glitchy sound any day.
A great setup for someone hoping to become a streamer focuses on three essentials:
- Clean sound: Viewers can forgive lower video quality but not harsh or muffled audio.
- Clear visuals: A stable, well-lit image goes further than ultra-high resolution.
- Reliable performance: You’ll need software that runs smoothly and an internet connection that can handle it.
Get those right, and your stream will look and feel professional, even with entry-level gear.
Choosing a computer or streaming device
Your computer is the engine of your stream. It handles encoding (turning your video into a livestream-friendly format), running your software, and pushing everything to the platform of your choice.
Most beginners start with a desktop or laptop they already own. As long as it meets modest performance standards, that’s fine. But streaming is resource-intensive, so if you’re a gamer, you’ll want to ensure your machine can handle both your game and your broadcasting software at the same time.
For reference:
- CPU: A quad-core processor can handle most beginner setups.
- RAM: 16GB is ideal; 8GB may suffice for lighter streaming.
- GPU: This is necessary for gaming or high-quality video capture. A mid-range GPU like an NVIDIA GTX 1660 or AMD equivalent works well.
If you’re streaming from a gaming console, you can start with built-in broadcasting tools. But for greater control and overlays, you’ll eventually want to connect your console to a computer via a capture card—devices like the Elgato HD60 X or AverMedia Live Gamer Mini are popular.
Creators who stream IRL content like traveling, vlogging, or outdoor activities can use phones paired with stabilizers. Here, portability and battery life matter more than processing power.
Getting good audio
Good audio is the difference between a stream people watch and one they stick with. It’s also the easiest upgrade to make early on.
Built-in laptop microphones or headset mics can work in a pinch, but they often pick up room noise and lack warmth. Investing in a dedicated microphone without breaking the bank will immediately elevate your stream’s quality.
There are two main mic categories:
USB microphones are plug-and-play, with no interface needed, making them perfect for beginners. Popular options include:
XLR microphones require an audio interface but offer better long-term flexibility and quality. Common beginner favorites:
- Audio-Technica AT2020
- Shure MV7 (can use USB and XLR)
Position your mic close to your mouth (about six to eight inches away) and use a pop filter to reduce plosives. For better room sound, consider foam panels or a small area rug to dampen echo.
A good image doesn’t necessarily mean a high-end camera. You can create professional-looking visuals with a simple webcam if you control your lighting and composition.
Webcams are usually fine for most beginners. Models like these are reliable, sharp, and easy to set up:
Mirrorless or DSLR cameras are a great upgrade when you’re ready for a more cinematic look, since they can dramatically improve your visual quality. But remember, you’ll need a capture card to connect them to your computer:
Phone cameras on modern smartphones have quality sensors, and apps like DroidCam or Iriun let you use them as webcams. This can be an affordable way to upgrade your visuals early on.
Framing and background matter as much as the camera itself. Position yourself in a well-lit space with some depth behind you; a bit of distance from your wall helps avoid flat, shadowy looks.
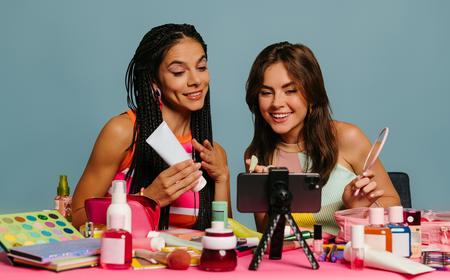
Creators in visual niches such as painters, crafters, and makeup artists should prioritize camera angles. A second camera mounted overhead or to the side gives viewers a clear view of your hands or workspace, making the stream more immersive.
Lighting a stream
Lighting is the cheapest way to make your stream look dramatically better. Even the best camera struggles without it.
Start simple. A ring light or two softbox lights positioned at 45-degree angles to your face will do wonders. If you’re using a webcam, this can completely change your image quality, reducing grain and sharpening your look.
Natural light works well, too, but it’s unpredictable. If you stream at varying times of day, consistent artificial lighting ensures your visuals remain stable.
Many streamers add accent lighting for personality, like LED strips or RGB lamps, for visual dynamism.
Lighting setups vary by niche:
- Gamers and talk show hosts often use colorful key lights and dynamic backgrounds.
- Artists or chefs favor neutral, bright lighting to showcase detail.
- Musicians may use warmer tones or stage lighting to create atmosphere.
Your streaming software is where everything comes together: your camera feed, mic input, graphics, alerts, and chat. Choosing the right software early makes a big difference in how comfortable and professional your stream feels.
- OBS Studio (Open Broadcaster Software): The industry standard, this is free, open-source, and customizable. It can handle multiple scenes, transitions, and plug-ins. While there’s a learning curve, it’s the most flexible option.
- Streamlabs: Built on OBS but with a more user-friendly interface, this integrates chat, alerts, and donation tools directly, making it ideal for beginners who want convenience over customization.
- Prism Live Studio: A rising favorite for mobile and cross-platform streaming, Prism supports YouTube, Twitch, Facebook, and more simultaneously.
Whichever software you choose, take time to learn scene transitions, audio levels, and overlay management. As we’ve said, streaming isn’t just pressing “go live”—it’s producing a show in real time.
For those in performance or educational niches, OBS and Streamlabs offer advanced layouts, such as picture-in-picture views, lower-thirds, or even dynamic screen captures for presentations.
This should be obvious: Even with the best gear, a weak internet connection will ruin your stream. A dropped frame or buffering message breaks the flow, and viewers don’t come back after too many interruptions.
For smooth streaming, aim for:
- Upload speed: At least 5 Mbps for 720p and 10 Mbps for 1080p. (4K requires much more.)
- Connection type: Always use wired Ethernet if possible. Wi-Fi, while convenient, can fluctuate unexpectedly.
Test your connection before going live. Most streaming platforms also include bitrate recommendations. Follow them closely to avoid overloads.
If you stream on the go, invest in a 5G hotspot or mobile router for reliability. For outdoor IRL creators, this can make the difference between a smooth stream and a constant disconnect.

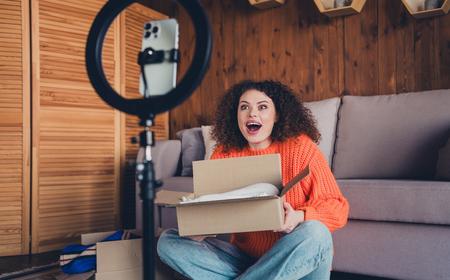
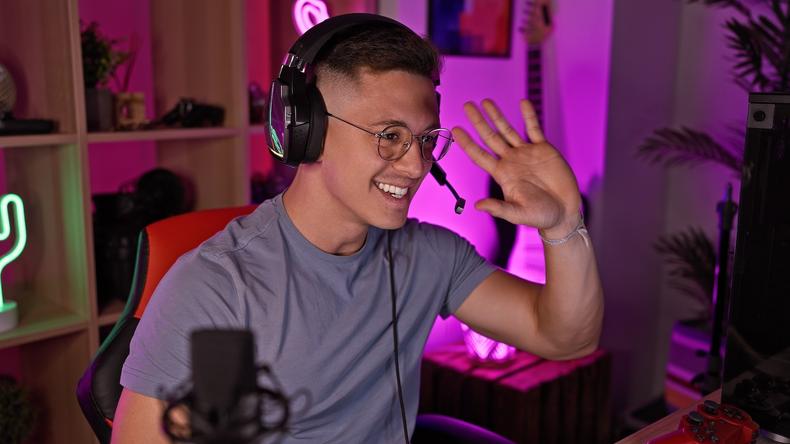
Credit: Arsenii Palivoda/Shutterstock
Even a basic stream benefits from small visual touches that reinforce your personality or brand. Overlays, or graphics showing your name, social handles, or follower alerts, can make your channel feel cohesive.
Most streaming software lets you add these as image or browser sources. But design isn’t everything. Engagement tools matter, too:
- Chat alerts and notifications turn interactions into moments.
- Channel points and emotes (on Twitch) reward viewer loyalty.
- Onscreen polls or Q&A sessions create interactivity, especially for educators or podcasters.
For creative streamers, overlays can double as storytelling tools, framing your canvas, showing progress bars, or including close-up cams. Branding grows over time, but even a clean, minimal overlay can make a big impression from day one.
Streamers stream a lot. Streaming for hours means you’ll spend a lot of time in your chair, so comfort and ergonomics will directly affect your performance.
A supportive chair, proper desk height, and good posture prevent fatigue during long sessions. You don’t need a flashy gaming chair; what matters is lumbar support and adjustability.
Cable management and a tidy workspace also contribute to focus, since a clutter-free area keeps your visuals clean and your workflow efficient.
Noise isolation can make a huge difference, too. Soft furnishings, curtains, and carpets help reduce reverb.
Not all streamers have the same needs. Your niche shapes how you prioritize gear and layout.
Gaming streamers: Balance performance and personality. A dual-monitor setup is helpful—one for gameplay, one for chat and controls. A capture card is essential for console streaming, and a comfortable headset ensures long sessions stay manageable.
Musicians and performers: Audio quality is everything, so XLR microphones, mixers, and interfaces are key investments.
Artists and makers: Here, angle is important, since viewers want to see the process clearly. Overhead cameras, bright neutral lighting, and smooth time-lapse features keep streams visually engaging.
Educators and coaches: Any teacher will tell you clarity and structure matter most. Screen sharing, digital whiteboards, and clear audio take precedence over flashy visuals. Tools like OBS scenes and StreamYard’s presentation features can mimic classroom layouts pretty effectively.
IRL and vlog streamers: Portability rules here. Lightweight tripods, phone gimbals, power banks, and stable mobile internet setups are the essentials. Image stabilization is worth every penny when your stream moves with you.
One of the best parts about streaming is watching your setup grow alongside your channel. Start small, and upgrade intentionally based on what expands your creative flow.
A good roadmap looks like this:
- Start with what you have, like a webcam, USB mic, and built-in lighting. Focus on learning software and being consistent.
- Upgrade audio and lighting. These give the biggest visual and emotional payoff.
- Add a second monitor, external camera, or capture card. Begin refining your brand with overlays.
- Invest in dedicated studio space, acoustic treatment, and advanced tools for reliability.
Viewers appreciate authenticity. They’ll watch your progression and often enjoy seeing your production evolve over time. Don’t wait for perfect gear to get started.
Credit: Krakenimages.com/Shutterstock
Once your gear is in place and your software is configured, it’s time to test. Run private or unlisted streams to troubleshoot audio balance, lighting, and scene transitions. Keep an eye on CPU usage and dropped frames.
More importantly, practice your flow. Treat it like hosting a show: Greet new viewers, respond to the chat, and narrate what you’re doing.
Streaming, like any content creation job, is as much about process as it is about presentation. The setup gets you started, but the rhythm you build—the energy, responsiveness, and authenticity—keeps people coming back.
So, clear your desk, test your mic, and open your streaming software. Your audience is out there, waiting for you to press “go live.”