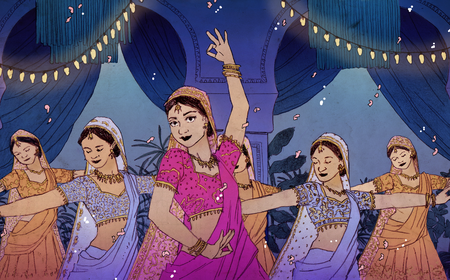
From the spooky skeletons of Tim Burton’s “The Nightmare Before Christmas” to the all-too-brief depression “claymaish” on “Parks and Recreation,” stop motion animation requires painstaking attention to detail and a whole heap of patience—but the rewards make it worthwhile. This animation style is behind many beloved cinematic classics and is also used by many content creators to craft stunning short videos. Let’s take a beat to explore the technique, frame by frame.
JUMP TO
Stop motion animation (also called stop frame animation) is a cinematic and creative technique that breathes life into physical objects through sequential photography. Objects are manipulated in tiny increments between each photograph, and when those frames are played back rapidly, the objects appear to move.
Though this method is an antique of the animation world, long predating CGI, it has enjoyed continual popularity across mediums because of its tangible, artisanal, and deliberate feel that’s difficult to replicate digitally. Audiences often sense the physicality and the touch of the human creator in each subtle motion.
You’ll find stop motion everywhere: professional films, short online clips, indie music videos, homemade advertisements, whimsical TikTok reels, pedagogical explainers, artistic installations, and so on. It invites both simplicity and sophistication. And while it’s technically easy to pull off, it requires a lot of work.
Although all stop motion is built on the same fundamental principle of moving objects between photographed frames, the materials, staging, and techniques can vary significantly. Each type brings its own aesthetic qualities and technical considerations.
- Object animation is perhaps the most straightforward form. It involves using everyday items (anything from office supplies to kitchen utensils) and making them move in ways they can’t in real life. Because these objects are already made, there’s no sculpting or building required, making it an accessible starting point for beginners. It’s also incredibly versatile; with a clever idea, a handful of items, and careful shooting, you can create playful stories that feel charming precisely because they use familiar, ordinary things.
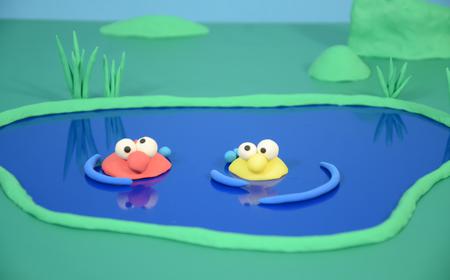
- Clay animation, often dubbed claymation, takes a more sculptural approach (literally). Figures and sets are crafted from malleable materials like clay or plasticine. These are often supported by an internal wire skeleton, or armature, to help maintain their shape. Clay is highly expressive; you can easily alter facial expressions or reshape limbs between shots. However, because clay is soft, it’s prone to fingerprints, dust, and deformation, so animators have to handle their models with care.
 What is Claymation? How to Make Your Own Clay Animation Movies
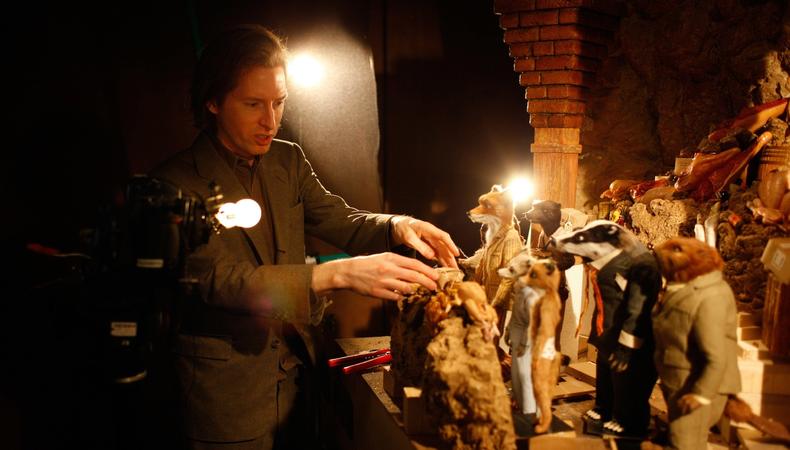
- Puppet animation uses fully articulated figures designed to hold their shape and pose over long shoots. These puppets can be made from materials like silicone, foam, or resin, with carefully engineered joints that allow for subtle, precise movements. This method is favored by studios producing feature-length stop motion films because it allows for consistency and durability. Building puppets is a specialized skill, but the payoff is a level of control that’s difficult to match.
- Cutout animation is one of the oldest versions of stop motion, likely because it’s so simple. It operates in two dimensions, using flat pieces, such as paper or fabric, arranged and moved on a flat surface. Each piece can be manipulated independently, much like a puppet, but the aesthetic is graphic and stylized. Cutout animation has a rich history, from early silhouette films to modern digital hybrids, and it’s ideal for artists who prefer collage work over sculpting.
- Pixilation is a particularly playful variation in which live actors are treated as if they were stop motion figures. Instead of moving naturally in front of a running camera, actors hold still while the photographer captures each frame, moving slightly between shots.
- Silhouette animation creates imagery entirely from shadows, usually by backlighting cutouts against a translucent screen. The result is a stark, high-contrast image that feels both delicate and dramatic. This approach is especially striking when combined with other materials, like colored gels or textured fabrics, to alter the quality of the light.
- Sand animation creates a more fluid, transformative aesthetic by moving, shaping, and brushing sand on a lit surface. Because sand is easily altered, it allows for smooth transitions and morphing shapes, though it also demands a steady hand and a clear plan to prevent accidental shifts.
- Light painting animation uses long-exposure photography to capture trails of light created by moving a light source through the frame. When sequenced, these trails appear to dance, swirl, or write messages in midair. While more niche and generally better for shorter videos, this offers a dreamlike and highly stylized effect.
Many animators mix and match these techniques, creating hybrid styles that draw on the strengths of multiple approaches. The only real limit is your imagination.
Let’s walk through the steps to producing your own stop motion project, from concept to final export. This guide assumes a basic home or studio setup, and is flexible across object, clay, puppet, cutout, and beyond.
1. Conceptualize and plan.
Dream up an idea. What story, action, or movement are you aiming for? Keep it doable—think small gestures at first.
Create storyboard or thumbnail sketches. Jot down specific poses or beats. You don’t need professional art; stick figures and quick notes will suffice.
Break down scenes. List settings or key moments to guide your build process.
2. Gather materials and build your world.
Pick stop motion software. Beginner-friendly options include Stop Motion Studio, iStopMotion, and iMovie; more advanced tools that allow precise onion-skinning and camera integration include Dragonframe, Adobe Premiere Pro, Final Cut Pro, and Blender.
Choose the medium. Toy figures? Clay? Paper cutouts? Live actors? Figure out what appeals to you, as well as what seems the most feasible given your setup, abilities, and time frame.
Design or assemble characters. For clay, sculpt figures with internal armatures (wire skeletons) for structure; for puppets, build or customize them with joints designed to hold poses; and for cutouts, craft layered and movable body parts (e.g., a head separate from a torso).
Build the set. Construct a minimal backdrop or scene, such as a tabletop, lightbox, tabletop diorama, painted background, sand tray, or cutout stage.
3. Set up your capture station.
Mount the camera. Use a tripod, desk-mounted rig, or stable stand. The camera must not move between shots.
Set up lighting. Consistent, static lighting eliminates flicker. Use softbox lights or clamp lamps; block windows with curtains if sunlight changes. For silhouette or sand, use backside or top-down lighting on translucent surfaces.
Decide on frame rate. Common choices include the smooth yet practical 12 fps (“twos”), in which each position is held for two frames; the fully fluid double frame (and double work) 24 fps (“ones”); and the stylized, jerky “threes” or “fours.”
4. Finagle your camera settings.
Enable manual control. Set manual focus, shutter speed, ISO, and white balance to avoid flicker.
Take test shots. Capture one frame, make a small movement, then capture another. Review onscreen for lighting consistency, framing, and clarity of movement.
5. Animate frame by frame.
Pose, shoot, adjust, repeat. Make minute changes, and remember that millimeters matter. Keep notes such as: “Frame 1: right arm up; Frame 2: right arm up and left foot forward,” and so on.
Be patient. Stop motion is notoriously slow, so you’ll need to be meticulous and never hasty.
Monitor your progress. After capturing a handful of frames, play them back to check the motion. This helps catch drift or inconsistencies early.
Address movement drift. Tiny nudges accumulate, so watch for settlement creeping in and reset the stage as needed.
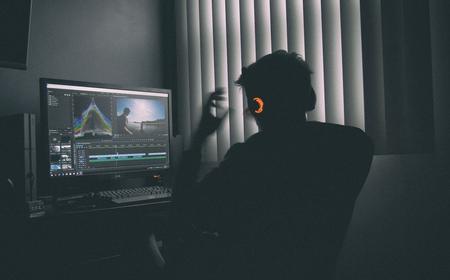
6. Import and edit the sequence.
Transfer and assemble frames. Copy images to a computer and organize them sequentially. Then, import the sequence to your software program of choice and set the frame rate (e.g., 12 fps). If supported, onion or ghosting frames can help align the position between frames.
Adjust the timing. Use “hold” or “repeat frame” for emphasis or slow parts.
Clean up. Remove unwanted bits like dust, visible supports, or stray shadows using the edit function.
7. Add audio components.
Create sound effects and Foley sounds. Sounds like squelches, squeaks, and clicks enhance the sense of realism.
Add music and voiceover. Choose audio that matches your animation’s style and tone, layering in dialogue or narration as needed.
Synchronize audio. Pinpoint key frames, such as one of your characters walking through the snow, and align them with sound cues, like crunchy snowsteps.
1. Patience is your best asset.
Stop motion is a marathon, not a sprint; creating even short animations can take hours or days. Strive to embrace the slow pace and savor each intentional motion.
2. Track your frame count.
Naming frames (“frame001.jpg,” “frame002.jpg,” etc.) helps keep everything in order and simplifies editing.
3. Maintain consistency.
Whether it’s lighting, camera settings, or object placement, ensure that all variables remain consistent. A single shift can really stand out when viewed in motion.
4. Embrace imperfection.
That said, some wobble or jitter gives charm. Unless it’s distracting, don’t become obsessed with the pursuit of perfection.
5. Learn from the pros.
Watch stop motion animations like the following to gain a more robust understanding of the technique and its many possibilities:
- “Sledgehammer” (1986) by Peter Gabriel has a landmark music video showcasing stop motion effects that have become a touchstone of 1980s animation.
- “Wallace & Gromit: A Grand Day Out” (1989) started off a franchise of claymation classics that have won multiple Oscars.
- “The Nightmare Before Christmas” (1993), the first feature-length stop motion animated film, required over 3,000 different heads for Jack Skellington alone and featured innovative motion control rigs.
- “James and the Giant Peach” (1996) masterfully combined stop motion with computer-generated imagery and live action.
- “Chicken Run” (2000) is the highest-grossing stop motion film of all time, likely due to its large-scale claymation production of animated fowl.
- “Coraline” (2009) helped pioneer 3D printing in stop motion animation.
- “Kubo and the Two Strings” (2016) features a gorgeous sequence that entailed creating 1.5-inch origami puppets using Tyvek material.
- “Guillermo del Toro’s Pinocchio” (2022) uses the technique to breathe new life into everyone’s favorite wooden puppet boy.
Many behind-the-scenes videos show how intricate even short scenes can be, as well as how gradually motion unfolds in rhythm.
Stop motion animation is a deeply expressive medium that bridges craftsmanship and storytelling. It’s accessible, requiring only a camera, some light, and a bit of creative patience. With a clear artistic vision, you can make something truly great.